
UV adhesive for LED assembly is often chosen when manufacturers need fast fixture speed, clean appearance, and controlled bonding on transparent or semi-transparent parts. In lighting production, the real challenge is not just making a joint stick; it is keeping lenses aligned, preserving optical clarity, and maintaining performance when the assembly runs hot for long periods. That is why material choice, cure access, and validation matter as much as line speed.
For teams comparing supply options, it can be useful to review UV adhesive manufacturing options for transparent LED assemblies early in the project. At ZDS, we typically look at the full use case rather than a single datasheet line: substrate pair, bond line thickness, UV access, heat load, yellowing risk, dispensing method, and whether the customer needs custom viscosity, packaging, sample trials, or OEM/private label support.
Why LED and Lighting Assemblies Use UV Adhesives
LED and lighting products reward adhesives that cure quickly and stay visually unobtrusive. Compared with many thermal or moisture-cure systems, a UV-curing adhesive can help reduce takt time, simplify assembly flow, and support precise positioning before final cure. This is especially attractive in lens bonding, light guides, decorative covers, and other parts where excess adhesive or visible haze can affect product appearance.
That said, a UV adhesive for LED is not automatically the right answer for every lighting part. If the geometry blocks light, if the bond line is deep, or if the component sees sustained heat from high-power LEDs, the selection window becomes narrower. In our formulation work, we usually separate lighting projects into three questions: can the adhesive cure where it is applied, will it remain optically acceptable, and can it survive the thermal environment long enough for the product’s service life?
Typical LED and Lighting Parts That Need Bonding
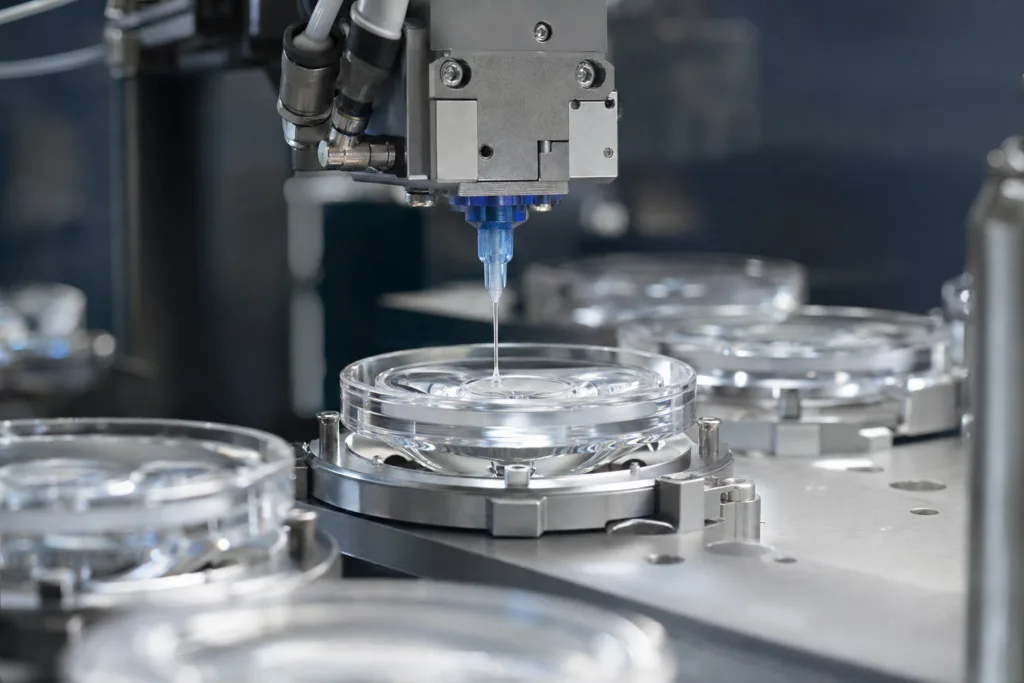
Lighting assemblies can include many different joint types, and each one places different demands on the adhesive. Some are cosmetic and optical, while others are structural or protective.
| Part | Primary concern | Typical adhesive priority |
|---|---|---|
| Lenses and covers | Clarity, alignment, low haze | Fast cure, low yellowing, clean dispense |
| Light guides | Optical transmission, distortion control | Very high clarity, controlled refractive impact |
| Decorative rings and trims | Appearance and edge cleanliness | Low shrinkage, minimal stringing |
| Transparent housings | Bond strength and visual quality | Good wetting, low haze, stable cure |
| Small electronic modules | Protection and process efficiency | Reliable cure, suitable viscosity, heat awareness |
For precision optical parts, we often evaluate a dedicated light-curing system such as ZDS-190611C high-performance UV adhesive for precision optics. For more flexible lens or cover interfaces, ZDS-191118B3 high-flexibility UV lens adhesive for lighting components may be a better fit when the joint needs some stress relief during thermal expansion or assembly handling.
How UV Adhesives Work in Lighting Assembly and Why Cure Access Matters
UV adhesives cure when exposed to suitable ultraviolet energy, which starts a polymerization process in the adhesive layer. In lighting assembly, this can create a useful production advantage: once the adhesive is positioned and the parts are aligned, the joint can be fixed quickly with light exposure. However, cure access is a design constraint, not a minor detail.
If the adhesive is shadowed by an opaque housing, metal bracket, printed circuit area, or an oddly shaped lens edge, the cure may be incomplete in those areas. The result can be weak adhesion, tacky surfaces, internal stress, or long-term reliability risk. This is why we often ask customers to show us the actual part drawing, not just the substrate names. Two projects that both use PC and PMMA can still need very different formulations if one has open exposure and the other hides the bond line inside a reflective cavity.
For shadowed zones, some teams combine UV curing with a secondary cure mechanism, or shift part of the protection strategy to a different chemistry. Where the design is truly a potting or encapsulation problem rather than a surface bond, it is often smarter to review potting adhesive options for LED protection and encapsulation instead of forcing a UV-only solution into a deep or blocked cavity.
Key Performance Requirements: Clarity, Low Yellowing, Bond Strength, and Heat Resistance
Lighting buyers usually care about four things at once: the adhesive must stay clear, bond well, not distort the optics, and tolerate heat. These requirements can work against each other, so selection is always a trade-off.
Clarity and low haze: the adhesive should not cloud the optical path or create visible seams that interfere with light output. This matters especially for decorative lighting, indicator lamps, and transparent housings.
Low yellowing: UV and heat aging can gradually change appearance. A transparent adhesive can look acceptable on day one and still fail cosmetically after aging if the chemistry is not designed for optical stability. For background on optical durability and weathering, the NIST overview of UV weathering and yellowing resistance testing for optical adhesives is a useful reference point.
Bond strength: the adhesive must hold the part through vibration, handling, and thermal movement. In LED products, bond strength is not only about static pull strength; it is also about whether the bond survives repeated heating and cooling.
Heat resistance: many LED assemblies experience local hot spots, especially near drivers, chip-on-board modules, or high-output packages. Heat can soften some adhesives, increase creep, or accelerate discoloration. If thermal load is a major design driver, teams should also evaluate thermally conductive adhesive options for heat-aware lighting design to see whether a heat-spreading solution is more appropriate than a standard clear bond.
Substrate Compatibility in LED Applications
Lighting products rarely use only one material. A lens may be polycarbonate, the housing may be aluminum or plated metal, and the light guide may be PMMA. The adhesive must wet the surface without attacking it and must keep its bond when the parts expand at different rates.
Common substrate considerations
- PC (polycarbonate): useful for impact resistance, but some adhesives or surface contaminants can cause stress cracking if the chemistry is too aggressive.
- PMMA: often selected for optical clarity; the adhesive must preserve transparency and avoid visible distortion.
- Glass: generally stable, but surface preparation and edge cleanliness matter for durable bonding.
- Metal: offers strength and heat management, but may need pretreatment or primer depending on oxide layer and finish.
- Mixed materials: the biggest risk is differential thermal movement, which can stress the bond during heating and cooling.
In practice, we ask whether the adhesive is bonding like materials or dissimilar materials, and whether the joint is carrying structural load or simply positioning parts. The answer changes the recommendation. A rigid adhesive may work well on a precise glass-to-metal light module, while a slightly more flexible formulation may be safer for a plastic lens on a metal frame.
Bonding Lenses, Covers, Light Guides, and Decorative Parts Without Optical Distortion
Lens bonding is where small formulation details become visible to the customer. If the adhesive flows too much, it can creep into the optical area. If it is too viscous, it may trap air or leave an uneven bond line. If it cures with shrinkage, it can pull the part out of alignment or create visible stress marks.
Good lens bonding practice usually starts with controlled dispense volume, clean edges, and a formulation that wets the target surface without flooding. In the lab, we often evaluate not only bond strength but also what the joint looks like after cure under backlight. A joint that looks acceptable in a flat inspection may reveal bubbles, edge whitening, or refractive distortion when viewed in actual lighting conditions.
For precision optical work, one of the most important approval questions is whether the adhesive introduces visible change in the light path. That is why a product like ZDS-190611C high-performance UV adhesive for precision optics is best evaluated with real parts, real lamp geometry, and a real inspection method rather than only with generic coupon testing.
Encapsulation and Edge Sealing: When UV Adhesive Is Suitable and When It Is Not
Some LED projects use UV adhesive not only for bonding but also for edge sealing or light-duty encapsulation. This can work well when the area is shallow, accessible to UV light, and not expected to block heat or protect deep electronics from moisture ingress. For small exposed edges, a UV-cure system can speed production and keep the assembly visually clean.
However, true encapsulation is a different problem. If the part needs deep potting, complex void filling, or long-term moisture barrier performance around hidden components, a UV-only adhesive is often the wrong tool. The same is true if air bubbles cannot escape or if the cure light cannot reach the full depth. In those cases, we usually steer buyers toward a dedicated potting or sealing chemistry rather than forcing a transparent bond adhesive to act like a deep-fill protective resin.
That distinction matters for procurement as well. A buyer may ask for one material to handle lens bonding, edge sealing, and full module protection. From a manufacturing standpoint, those are often three different requirements, and mixing them into one product can create avoidable failure risk.
Heat Exposure and Long-Term Aging Near LEDs
Heat is one of the main reasons lighting adhesives underperform in real use. Even if the ambient environment seems moderate, the joint may sit close to a hot LED array, reflector, or driver component. Over time, heat can change modulus, reduce adhesion, or accelerate discoloration. It can also intensify stress at the interface between a rigid adhesive and a moving plastic substrate.
When we look at aging risk, we think in terms of service temperature, thermal cycling, and local hot spots rather than only the nominal product spec. A transparent bond that looks stable after room-temperature cure may still show edge lift, haze, or embrittlement after repeated cycling. The DOE’s discussion of reliability validation methods for LED lighting assemblies is a good reminder that lighting durability must be checked in a system context, not just at the adhesive level.
In many LED projects, the most reliable approach is to choose an adhesive with enough thermal margin for the real operating environment and then confirm it under accelerated aging. If the adhesive is near its limit, production consistency becomes much harder because small differences in cure, film thickness, or substrate surface condition can shift the result.
Common Problems in LED Assembly and What Usually Causes Them
| Problem | Likely cause | Practical response |
|---|---|---|
| Yellowing | UV or heat aging, unsuitable chemistry | Test optical stability under realistic exposure |
| Lens shift | Low green strength, poor fixture control | Adjust viscosity, dispense volume, and fixture time |
| Poor heat aging | Adhesive too soft or not thermally stable enough | Recheck service temperature and aging data |
| Shrinkage | Formulation or cure stress | Use a lower-shrink design and verify bond line thickness |
| Stress cracking | Adhesive attack on sensitive plastic | Review substrate compatibility and cure chemistry |
| Void formation | Air entrapment or poor wetting | Change dispense method and inspect part geometry |
In our experience, many “adhesive failures” are really process mismatches. A good formula used in the wrong application window will still fail. That is why we try to separate material selection from process control when troubleshooting a lighting issue.
How to Evaluate Cure Speed, Depth of Cure, and Shadowed Areas
In a production line, cure speed must be judged together with cure completeness. Fast surface cure is useful, but it is not enough if the interior remains undercured. Transparent parts can sometimes make cure look easier than it is, because the adhesive appears exposed even when the actual bond line has hidden geometry.
When evaluating a UV adhesive for LED use, we usually check three practical points:
- Surface cure: does the exposed area set quickly enough for handling and indexing?
- Depth of cure: does the adhesive harden through the full bond line thickness?
- Shadow tolerance: can the material handle partial blockage, or does the design require full light access?
For transparent or semi-transparent parts, the ideal test is not only a small coupon under a lamp, but an actual part with the intended geometry. Light scatter, curvature, internal ribs, and reflective surfaces can all change the real cure profile. If the cure window is tight, line speed may need to be adjusted, or the formulation may need a different photoinitiator balance.
What to Validate Before Approval
Before approving a lighting adhesive for production, engineers and buyers should confirm both appearance and reliability. We recommend treating approval as a short validation program, not a one-time sample check.
- Optical clarity: inspect under real lighting conditions, not only white bench light.
- Adhesion: confirm bonding on the actual substrates and surface finish used in production.
- Thermal cycling: look for bond movement, cracking, or appearance changes after repeated temperature swings.
- Aging: check whether the part yellows, hazes, or embrittles over time.
- Vibration: evaluate whether the lens or cover stays aligned under shipment or use conditions.
- Process stability: verify that the adhesive dispenses consistently from batch to batch.
For teams building a formal test plan, the article Practical Guide: Adhesive Testing Methods Buyers Should Understand is a useful companion, because it helps connect lab tests to procurement decisions and production risk.
Application and Production Considerations
Even a strong technical formulation can struggle if the process setup is wrong. Lighting assembly teams should define the dispensing method, fixture sequence, and inspection step before approving the adhesive.
Dispensing method: jetting, timed pressure dispensing, manual syringe, or automated dotting each changes bead shape and air entrapment risk.
Open time: the assembly must have enough working time to place and align the part before exposure.
Line speed: the adhesive should match the plant’s takt time, not force the line to slow down excessively.
Reworkability: if misalignment happens, the team should know whether the part can be repositioned before full cure.
Batch consistency: lighting production is sensitive to small changes in viscosity, cure response, and clarity, so supplier control matters.
From our adhesive manufacturing perspective, the best materials are the ones that keep the production team’s process stable, not just the ones that look impressive on a datasheet. That is also why many customers start with ZDS when they need to compare formulation options, packaging formats, or OEM adjustments across different lighting programs.
When to Request Custom Formulation or OEM Support
Custom formulation becomes valuable when the standard product is close but not quite right. In LED and lighting work, that often means a change in viscosity, cure speed, flexibility, clarity, or thermal behavior. It may also mean changing packaging from bulk to syringe, cartridge, or production-ready dispensing format.
OEM support is especially useful when a customer has a defined lamp architecture but does not yet know which balance of properties will survive real assembly. We often help teams compare samples side by side, then adjust based on what they see in the part: flow control, edge wetting, optical visibility, and heat aging results. For projects that need only a narrow performance window, a small formulation adjustment can save a production program from repeated requalification later.
If the challenge is primarily about protecting electronics or absorbing thermal stress, it may be better to move away from a pure optical bond and toward a more suitable protective chemistry. If the challenge is mainly light guide clarity or lens retention, then a targeted UV-curing adhesive remains a strong candidate.
How ZDS Helps Customers Select UV Adhesives for LED Applications
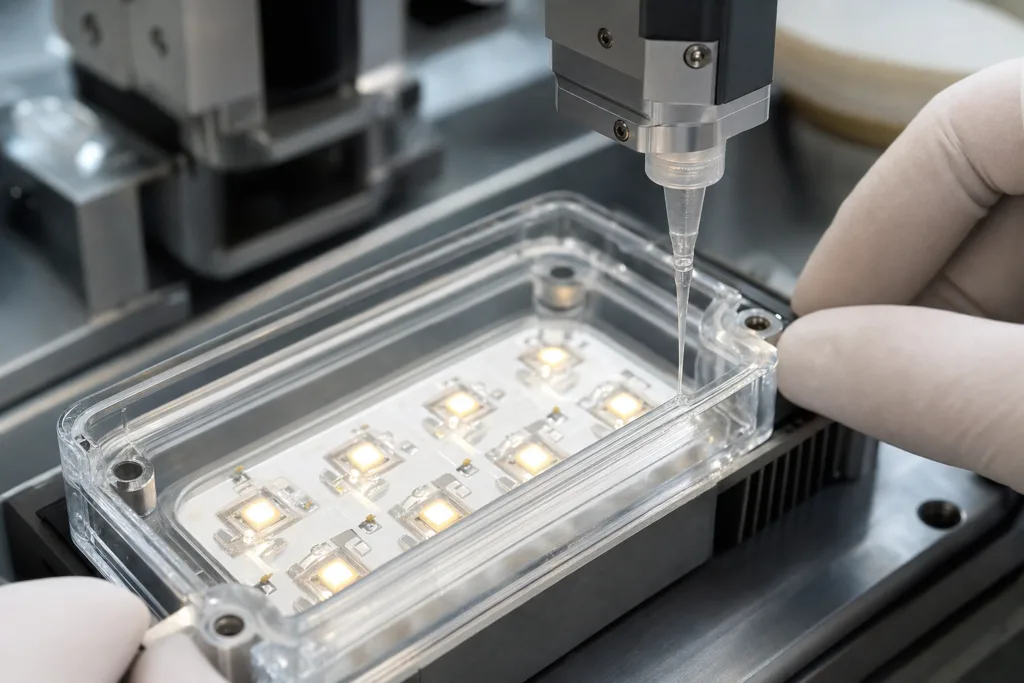
At ZDS, we approach lighting projects as application problems first and product choices second. We review the substrate pair, bond geometry, heat exposure, optical requirement, curing access, and production method before recommending a formulation direction. That approach helps buyers avoid over-specifying one property while missing another.
For example, a lens bonding job may need a different balance than a decorative cover. A visible front-facing joint may need higher clarity and lower haze, while a hidden edge seal may prioritize speed and ease of dispensing. In both cases, the right UV adhesive for LED assembly is the one that fits the real production environment, not just the ideal lab setting.
When lighting manufacturers share parts, process photos, and target performance goals, we can usually narrow the options quickly and support sample trials, packaging decisions, and production planning with more confidence.
Frequently Asked Questions
What makes a UV adhesive suitable for LED and lighting assemblies?
A suitable lighting adhesive should cure reliably with available UV access, maintain clarity, resist yellowing as much as possible, and hold up to the heat and movement expected in service. The best choice depends on whether the part is a lens, cover, light guide, or protective edge seal.
Can UV adhesive bond PC and PMMA parts used in lighting?
Yes, but the formulation must be checked for stress-crack risk, optical distortion, and compatibility with the specific surface finish. Because PC and PMMA respond differently to stress and chemistry, samples should be tested on the actual part geometry before approval.
Is UV adhesive a good choice for encapsulating LED electronics?
It can work for shallow, accessible protection or edge sealing, but it is usually not the best choice for deep potting or fully shadowed cavities. If the material cannot receive enough UV exposure through the full depth, a different encapsulation approach is usually safer.
How do we test whether the adhesive will yellow over time?
Use aging evaluation on real parts whenever possible, then inspect clarity after heat and UV exposure. Optical stability can also be supported by weathering-style tests that simulate long-term light exposure and thermal stress.
What should buyers ask a UV adhesive manufacturer before ordering samples?
Ask about substrate compatibility, cure depth, viscosity, packaging options, line speed fit, heat resistance, and whether the supplier can adjust the formula for your assembly process. It also helps to ask how batch consistency and QC are controlled.
When should we request a custom or OEM formulation?
Request customization when the standard product is close but not ideal for your lens geometry, cure window, thermal load, or clarity target. Custom work is especially useful when you need specific dispensing behavior, a different hardness, or packaging matched to production equipment.
Related Reading
- UV Curable Adhesives: How They Work, Where They Excel, and How to Choose the Right Formula
- Silicone Adhesives for LED and Lighting Assemblies: Balancing Heat Resistance, Optical Clarity, and Long-Term Weatherability
- Adhesives for LED and Electronics Assembly: How to Balance Speed, Precision, Thermal Management, and Reliability
- adhesive selection technical support for application-specific requirements
- Practical Guide: Adhesive Testing Methods Buyers Should Understand